The Ultimate macOS Web Development Setup: From Zero to Pro in 2024
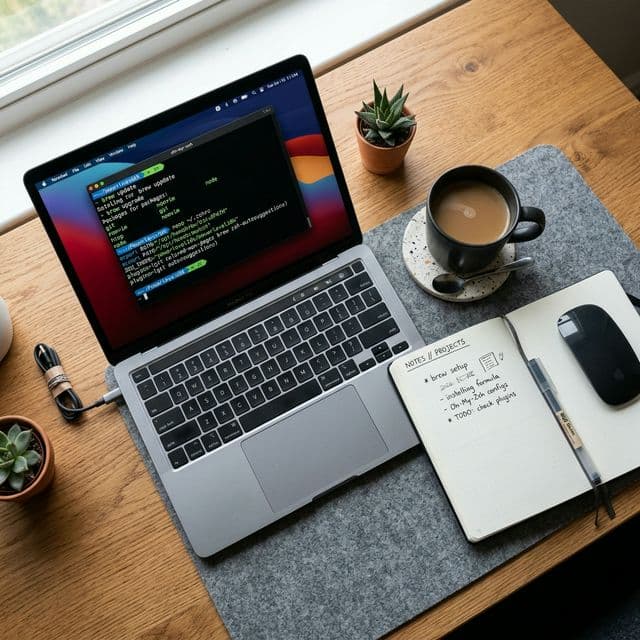
There is a specific kind of "new car smell" associated with unboxing a brand-new MacBook. But for a developer, the real excitement begins after the initial setup screen. Transforming a consumer laptop into a high-performance development workstation is a ritual—and doing it correctly the first time will save you hundreds of hours of troubleshooting "path errors" and "permission denied" messages later.
In this guide, we will walk through the professional sequence for setting up your MacBook for modern web development, focusing on the M1/M2/M3 (Apple Silicon) architecture.
1. The Foundation: Xcode Command Line Tools
Before you install anything else, you need the underlying compilers and tools that macOS uses for development. Open your Terminal and run:
xcode-select --installA popup will appear. Click "Install" and wait for it to finish. This provides you with essentials like make, gcc, and git.
2. The Package Manager: Homebrew (The "App Store" for Devs)
Homebrew is the industry-standard package manager for macOS. It allows you to install nearly any piece of software via the command line.
Paste this into your Terminal:
/bin/bash -c "$(curl -fsSL https://raw.githubusercontent.com/Homebrew/install/HEAD/install.sh)"Important for Apple Silicon users: After installation, follow the "Next Steps" in your terminal to add Homebrew to your PATH. It usually involves adding two lines to your ~/.zprofile.
3. Mastering the Shell: Oh My Zsh and Powerlevel10k
The default macOS Terminal is functional but sterile. A professional setup uses Zsh (the default) paired with Oh My Zsh for plugin management.
Install Oh My Zsh:
sh -c "$(curl -fsSL https://raw.githubusercontent.com/ohmyzsh/ohmyzsh/master/tools/install.sh)"Add a Theme (Powerlevel10k):
Most pros use the P10k theme because it's insanely fast and provides visual cues for your Git status, Node version, and Python environments directly in the prompt.
git clone --depth=1 https://github.com/romkatv/powerlevel10k.git ${ZSH_CUSTOM:-$HOME/.oh-my-zsh/custom}/themes/powerlevel10kSet ZSH_THEME="powerlevel10k/powerlevel10k" in your ~/.zshrc.
4. The Runtime: Don't Just brew install node
One of the most common mistakes is installing Node.js directly through Homebrew. This leads to permission issues when using npm install -g. Instead, use NVM (Node Version Manager) or fnm.
Why? Because as a pro, you’ll work on projects that require Node 18, Node 20, and sometimes an older legacy version. NVM lets you switch between them instantly.
curl -o- https://raw.githubusercontent.com/nvm-sh/nvm/v0.39.7/install.sh | bashOnce installed, simply run nvm install --lts to get the latest stable version of Node.
5. The IDE: Visual Studio Code Configuration
VS Code is the king of web dev. But out of the box, it’s just a text editor. You need the right extensions:
- Prettier: For consistent code formatting.
- ESLint: To catch bugs before you even save your file.
- Tailwind CSS IntelliSense: If you’re styling with Tailwind.
- GitLens: To see who changed what and when.
- Auto Rename Tag: Essential for HTML/JSX work.
Pro Tip: Enable "Editor: Format On Save" in your settings. It’s a life-changer.
6. Docker and Containers: The Local Environment
As you move beyond simple front-end work, you’ll need databases like PostgreSQL or Redis. Don't install them directly on your Mac; it clutters your system. Install Docker Desktop (or OrbStack for a faster, lighter alternative).
Use docker-compose to spin up your entire dev environment in a containerized, isolated space.
7. Productivity Boosters: Raycast and Rectangle
- Raycast: A powerful replacement for Spotlight. It has a built-in clipboard manager, window management, and a massive store of developer plugins (calculate timestamps, format JSON, etc.).
- Rectangle: (Built into Raycast now, but available separately) For snapping windows to specific parts of your screen using keyboard shortcuts.
8. Git and SSH Security
Set up your SSH keys for GitHub so you never have to type your password again.
ssh-keygen -t ed25519 -C "your_email@example.com"
ssh-add --apple-use-keychain ~/.ssh/id_ed25519
Copy the public key and add it to your GitHub settings.
Conclusion: Keep it Clean
Your MacBook is your tool. Keep it organized. Use a dedicated ~/Developer or ~/Code folder. Regularly run brew cleanup and prune your old Docker images. A clean system leads to a clean mind, and a clean mind writes better code.
What's your 'must-have' tool that didn't make the list? Share your macOS setup tips in the comments below!